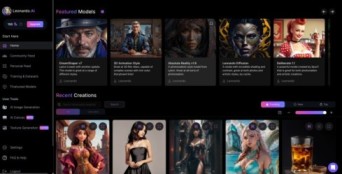
Leonardo AI is an innovative AI platform focused on generating and refining high-quality art, 3D models, textures, game assets, and more. It’s particularly useful for digital artists, game developers, designers, and creators looking to streamline their workflows with AI-driven assistance. Below is a detailed guide on how to work with Leonardo AI, from setting up to using its key features:
1. Getting Started with Leonardo AI
a) Signing Up
- Visit the official website of Leonardo AI.
- Create an account by signing up with your email or using a social media platform (like Google or Facebook).
- Once signed up, you’ll be directed to the dashboard where you can start exploring various features of the platform.
b) Setting Up Preferences
- Once logged in, navigate to your profile or settings to customize your preferences.
- You can set your working environment based on the types of assets you’re interested in, such as 2D images, 3D models, game assets, etc.
2. Exploring Leonardo AI Features
Leonardo AI offers a variety of tools for different creative purposes:
a) 2D Image Generation
- You can use text prompts to generate high-quality images.
- Step 1: Navigate to the Text-to-Image section.
- Step 2: Input a detailed text description of the image you’d like to generate. The more specific the description, the better the result.
- Step 3: Customize additional settings like style, resolution, and rendering preferences.
- Step 4: Click Generate, and the AI will create an image based on your description.
b) 3D Model Creation
- Leonardo AI excels in generating 3D assets like models and textures.
- Step 1: Go to the 3D Asset Generator.
- Step 2: Select or describe the model you want to create.
- Step 3: The AI will offer customizable templates for characters, objects, or textures based on your project needs.
- Step 4: Once generated, you can export these models for further refinement in other 3D design software such as Blender or Maya.
c) Texture Generation
- You can generate seamless textures for game design or other projects:
- Step 1: Go to the Texture Generator.
- Step 2: Choose the type of texture (e.g., wood, metal, fabric) and specify the resolution.
- Step 3: Optionally add texture details through descriptive prompts.
- Step 4: Click Generate, and export the texture to use in 3D models or game development.
3. Using Leonardo AI for Game Asset Creation
Leonardo AI is designed for game developers looking to generate assets quickly. It simplifies the process of creating characters, environments, and objects that can be directly imported into game engines like Unity or Unreal Engine.
- Step 1: Choose the Game Asset Creator feature.
- Step 2: Specify the type of asset you need (e.g., characters, objects, vehicles).
- Step 3: Use templates or prompts to customize the asset’s appearance and specifications.
- Step 4: Export the asset in compatible formats for game engines (.FBX, .OBJ).
4. Advanced Features
a) Inpainting and Outpainting
- Inpainting allows you to edit parts of an image by replacing or refining specific areas.
- Step 1: Select the area of the image you want to modify.
- Step 2: Use prompts to describe the changes you want to make.
- Step 3: Leonardo AI will fill in the specified area based on your description.
b) Outpainting expands an image beyond its current borders, useful for adding context or enlarging an image.
- Step 1: Define the edges where you want to expand.
- Step 2: Describe the desired continuation.
- Step 3: The AI will generate additional content around the image, maintaining the same style and composition.
5. Training and Custom Models
Leonardo AI allows users to train custom models by feeding them a dataset of images or assets. This feature is useful for creating highly specific outputs based on your own style or preferences.
- Step 1: Upload your dataset to train a custom model.
- Step 2: Adjust parameters such as image size, resolution, and learning rate.
- Step 3: Train the model, and once complete, you can use it to generate unique assets based on your dataset.
6. Collaboration and Community Features
Leonardo AI offers collaboration features that let multiple users work together on the same project in real-time. It’s an excellent feature for teams working on game design or large creative projects.
- You can also share your work with the broader Leonardo AI community, get feedback, and explore creations from others for inspiration.
7. Exporting and Integrating with Other Tools
Leonardo AI supports multiple export formats that make it easy to integrate your generated assets into other tools:
- For 3D models, you can export to .FBX, .OBJ, or .GLTF.
- For images and textures, you can save files as PNG, JPG, or TIFF.
- Assets can be seamlessly imported into software like Photoshop, Blender, Maya, and game engines like Unity and Unreal Engine.
8. Pricing Plans and Access
Leonardo AI offers a range of pricing plans, including free trials and paid subscriptions that unlock additional features such as higher-resolution outputs, faster render times, and priority support.
9. Tips for Best Results
- Be Specific with Prompts: The more detailed your input, the more accurate the output.
- Experiment with Settings: Test different styles, resolutions, and rendering modes for varied results.
- Iterate: AI-generated content often improves with refinement. Re-run models or make small adjustments to prompts for enhanced outcomes.
Conclusion
Leonardo AI is a powerful tool for artists, designers, and game developers looking to leverage AI for creative work. It offers robust features like 2D image generation, 3D model creation, texture generation, and inpainting/outpainting, making it highly versatile. By experimenting with its tools, you can significantly speed up your creative processes while maintaining high-quality results.
Table of Contents
Discover more from
Subscribe to get the latest posts sent to your email.
