Category Archives: Home

Comprehensive-Guide-To-Computer-Software-Types-Sectors-And-Emerging-Trends

Computer software is an essential component of modern technology,Comprehensive-Guide-To-Computer-Software-Types-Sectors-And-Emerging-Trends enabling users to Comprehensive Guide to Comprehensive-Guide-To-Computer-Software-Types-Sectors-And-Emerging-Trends from basic computing to advanced technical functions. Software can be broadly categorized into two main types: system software and application software. This guide will explore these categories, their components, and various sectors where software is applied.

1. System Software

System software serves as the foundation for application software, managing hardware resources and providing an environment for applications to run. Key components include:

a. Operating Systems (OS)

  • Windows: A popular OS for personal computers and enterprise environments.
  • macOS: Apple’s proprietary OS for Mac computers.
  • Linux: An open-source OS used in servers, desktops, and embedded systems.
  • UNIX: A powerful, multiuser OS used in servers and workstations.

b. Device Drivers

Device drivers are specialized programs that allow the OS to communicate with hardware components like printers, graphics cards, and network adapters.

c. Utility Programs

Utilities perform maintenance tasks such as virus scanning, disk cleanup, and file management. Examples include:

  • Antivirus software: Protects against malware and other security threats.
  • Disk defragmenters: Optimize file storage on hard drives.

2. Application Software

Application software helps users perform specific tasks. It can be further categorized into several types based on functionality:

a. Productivity Software

  • Word Processors: Microsoft Word, Google Docs.
  • Spreadsheets: Microsoft Excel, Google Sheets.
  • Presentation Software: Microsoft PowerPoint, Keynote.

b. Multimedia Software

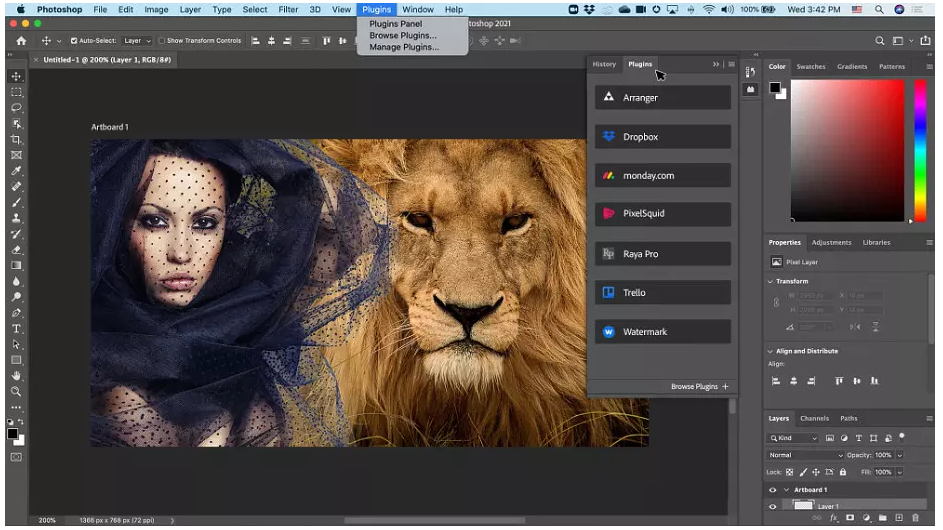
  • Image Editing: Adobe Photoshop, GIMP.
  • Video Editing: Adobe Premiere Pro, Final Cut Pro.
  • Audio Editing: Audacity, GarageBand.

c. Internet Software

  • Web Browsers: Google Chrome, Mozilla Firefox.
  • Email Clients: Microsoft Outlook, Thunderbird.
  • FTP Clients: FileZilla, WinSCP.

d. Educational Software

  • Language Learning: Duolingo, Rosetta Stone.
  • Mathematics: MATLAB, GeoGebra.
  • E-learning Platforms: Moodle, Coursera.

e. Business Software

  • Customer Relationship Management (CRM): Salesforce, Zoho CRM.
  • Enterprise Resource Planning (ERP): SAP, Oracle.
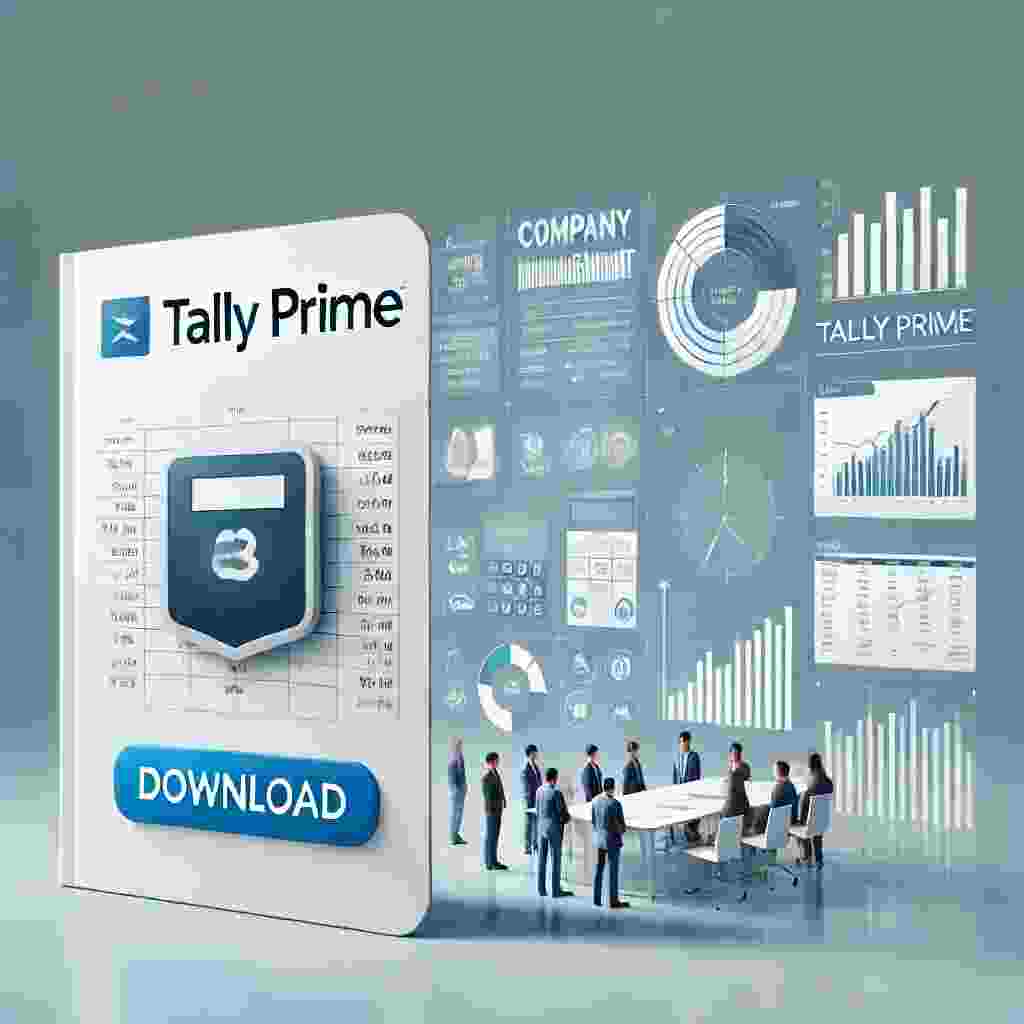
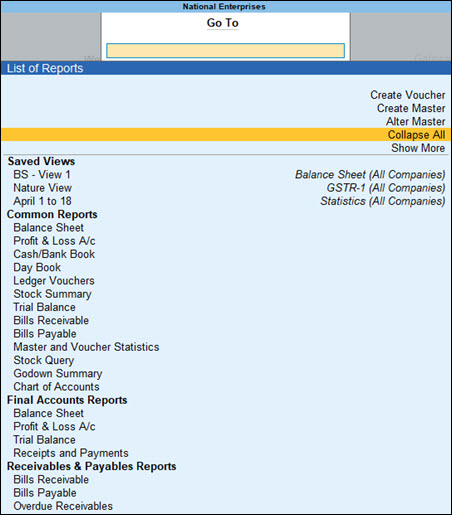
  • Accounting Software: QuickBooks, Tally.

3. Sectors of Software Application

Computer software is vital across various sectors, each requiring specialized applications to meet their unique needs.

a. Healthcare

  • Electronic Health Records (EHR): EPIC, Cerner.
  • Medical Imaging Software: GE Healthcare, Philips IntelliSpace.

b. Education

  • Learning Management Systems (LMS): Blackboard, Canvas.
  • Assessment Tools: Kahoot, Quizlet.

c. Finance

  • Banking Software: Temenos, Finastra.
  • Trading Platforms: MetaTrader, E*TRADE.

d. Manufacturing

  • Computer-Aided Design (CAD): AutoCAD, SolidWorks.
  • Manufacturing Execution Systems (MES): Siemens, Honeywell.

e. Retail

  • Point of Sale (POS): Square, Shopify.
  • Inventory Management: Fishbowl, TradeGecko.

f. Entertainment

  • Game Development: Unity, Unreal Engine.
  • Streaming Services: Netflix, Spotify.

a. Artificial Intelligence (AI)

AI-powered software applications are transforming industries by enabling advanced data analysis, automation, and decision-making.

b. Cloud Computing

Cloud-based software provides scalable and flexible solutions, enabling remote access and collaboration.

c. Cybersecurity

With the increasing threat of cyber attacks, robust security software is essential for protecting data and maintaining privacy. Comprehensive-Guide-To-Computer-Software-Types-Sectors-And-Emerging-Trends

d. Internet of Things (IoT)

IoT software connects devices, enabling them to communicate and perform tasks autonomously. Comprehensive-Guide-To-Computer-Software-Types-Sectors-And-Emerging-Trends

e. Blockchain

Blockchain technology is revolutionizing sectors like finance and supply chain management by providing transparent and secure transaction records.

5. Types of Computer Software

Computer software can be categorized into several types based on its functionality and purpose. Here’s an in-depth look at various types:

a. System Software

System software includes the operating system and all utility programs that manage computer resources at a low level.

  1. Operating Systems (OS)
  • Windows: Widely used in personal and business environments.
  • macOS: Known for its user-friendly interface, popular among creative professionals.
  • Linux: Open-source and highly customizable, used in servers and desktops.
  • UNIX: Stable and secure, used in enterprise environments.
  1. Device Drivers
  • Enable the OS to interact with hardware devices like printers, graphics cards, and sound cards.
  1. Utility Programs
  • Antivirus Software: E.g., Norton, McAfee.
  • Backup Software: E.g., Acronis True Image, Carbonite.
  • Disk Cleanup Tools: E.g., CCleaner, Windows Disk Cleanup.

b. Application Software

Application software includes programs that help users perform specific tasks.

  1. Productivity Software
  • Word Processors: E.g., Microsoft Word, Google Docs.
  • Spreadsheets: E.g., Microsoft Excel, Google Sheets.
  • Presentation Software: E.g., Microsoft PowerPoint, Prezi.
  1. Multimedia Software
  • Image Editing: E.g., Adobe Photoshop, CorelDRAW.
  • Video Editing: E.g., Adobe Premiere Pro, Final Cut Pro.
  • Audio Editing: E.g., Audacity, FL Studio.
  1. Internet Software
  • Web Browsers: E.g., Google Chrome, Mozilla Firefox.
  • Email Clients: E.g., Microsoft Outlook, Apple Mail.
  • FTP Clients: E.g., FileZilla, Cyberduck.
  1. Educational Software
  • Language Learning: E.g., Duolingo, Rosetta Stone.
  • Mathematics: E.g., Wolfram Alpha, MATLAB.
  • E-learning Platforms: E.g., Coursera, Khan Academy.
  1. Business Software
  • CRM Software: E.g., Salesforce, HubSpot.
  • ERP Software: E.g., SAP, Oracle ERP.
  • Accounting Software: E.g., QuickBooks, Xero.
  1. Graphics Software
  • 2D and 3D Modeling: E.g., AutoCAD, Blender.
  • Desktop Publishing: E.g., Adobe InDesign, QuarkXPress.

6. Software Development and Programming Languages

Software development involves designing, coding, testing, and maintaining applications and systems. Key aspects include:

a. Software Development Life Cycle (SDLC)

The SDLC provides a structured approach to software development. Key phases include:

  1. Requirement Analysis: Understanding what the user needs.
  2. Design: Planning the software architecture and user interface.
  3. Implementation (Coding): Writing the actual code.
  4. Testing: Ensuring the software works correctly.
  5. Deployment: Releasing the software to users.
  6. Maintenance: Updating and fixing the software as needed.

b. Programming Languages

Different programming languages serve various purposes. Some common ones include:

  1. Python: Versatile and easy to learn, used for web development, data analysis, AI.
  2. Java: Object-oriented, used for enterprise applications, Android development.
  3. C++: High-performance language used in system/software development, game development.
  4. JavaScript: Essential for web development, enables interactive web pages.
  5. Ruby: Known for its simplicity, used in web development (e.g., Ruby on Rails).
  6. SQL: Used for database management and operations.

7. Software in Different Sectors

a. Healthcare

  • EHR Systems: Manage patient records digitally.
  • Medical Imaging Software: Analyze X-rays, MRIs, etc.

b. Education

  • LMS (Learning Management Systems): Manage and deliver online courses.
  • Virtual Classrooms: Enable live online teaching and interaction.

c. Finance

  • Banking Software: Manage accounts, transactions, and customer data.
  • Trading Platforms: Facilitate buying and selling of financial instruments.

d. Manufacturing

  • CAD Software: Design products and parts digitally.
  • MES (Manufacturing Execution Systems): Monitor and control manufacturing processes.

e. Retail

  • POS Systems: Manage sales transactions and inventory.
  • E-commerce Platforms: Facilitate online shopping and sales.

f. Entertainment

  • Game Engines: Develop video games (e.g., Unity, Unreal Engine).
  • Streaming Services: Provide digital media content (e.g., Netflix, Spotify).

a. Artificial Intelligence (AI)

AI integrates machine learning and deep learning to enable advanced data analysis and automation. Applications include:

  • Natural Language Processing (NLP): For chatbots and language translation.
  • Computer Vision: For image and video analysis.

b. Cloud Computing

Cloud services provide scalable and flexible computing resources over the internet. Key providers include:

  • Amazon Web Services (AWS)
  • Microsoft Azure
  • Google Cloud Platform (GCP)

c. Cybersecurity

With growing cyber threats, robust security software is essential for protecting data and networks. Solutions include: Comprehensive-Guide-To-Computer-Software-Types-Sectors-And-Emerging-Trends

  • Firewalls
  • Encryption Tools
  • Intrusion Detection Systems (IDS)

d. Internet of Things (IoT)

IoT connects physical devices to the internet, enabling them to communicate and perform tasks autonomously. Examples include: Comprehensive-Guide-To-Computer-Software-Types-Sectors-And-Emerging-Trends

  • Smart Home Devices: Thermostats, security cameras.
  • Industrial IoT: Monitoring and optimizing manufacturing processes.

e. Blockchain

Blockchain technology ensures secure and transparent transactions. Applications include:

  • Cryptocurrencies: Bitcoin, Ethereum.
  • Supply Chain Management: Tracking goods and verifying authenticity.

9. Software Licensing and Distribution

Software licensing and distribution are crucial aspects of the software industry, ensuring that software creators are compensated for their work while users comply with legal terms and conditions. Comprehensive-Guide-To-Computer-Software-Types-Sectors-And-Emerging-Trends

a. Types of Software Licenses

  1. Proprietary License
  • Software is owned by the developer or company.
  • Users must purchase a license to use the software.
  • Example: Microsoft Office, Adobe Creative Suite.
  1. Open Source License
  • Software source code is freely available for anyone to view, modify, and distribute.
  • Common licenses include GNU General Public License (GPL), MIT License, Apache License.
  • Example: Linux, Apache HTTP Server.
  1. Freeware
  • Software is available for free but the source code is not provided.
  • Users can use the software without paying, but with certain restrictions.
  • Example: Google Chrome, Adobe Acrobat Reader. Comprehensive-Guide-To-Computer-Software-Types-Sectors-And-Emerging-Trends
  1. Shareware
  • Software is distributed for free on a trial basis.
  • Users must pay to continue using the software after the trial period.
  • Example: WinRAR, some antivirus programs.
  1. Freemium
  • Basic version of the software is free; advanced features require payment.
  • Often used in mobile apps and games.
  • Example: Spotify, LinkedIn. Comprehensive-Guide-To-Computer-Software-Types-Sectors-And-Emerging-Trends

b. Software Distribution Models

  1. Physical Distribution
  • Software is sold in physical formats like CDs, DVDs, and USB drives.
  • Becoming less common with the rise of digital distribution.
  1. Digital Distribution
  • Software is downloaded from the internet.
  • Platforms include official websites, app stores (Google Play, Apple App Store), and digital distribution services (Steam, Microsoft Store).
  1. Subscription-Based
  • Users pay a recurring fee to use the software.
  • Often includes regular updates and new features.
  • Example: Adobe Creative Cloud, Microsoft 365.
  1. SaaS (Software as a Service)
  • Software is hosted on the cloud and accessed via the internet.
  • Users subscribe to the service rather than purchasing the software outright.
  • Example: Google Workspace, Salesforce.

10. Software Maintenance and Updates

Maintaining and updating software is essential to ensure it remains functional, secure, and relevant.

a. Types of Maintenance

  1. Corrective Maintenance
  • Fixes bugs and errors identified after the software is deployed.
  1. Adaptive Maintenance
  • Updates software to work with new or changing environments (e.g., new operating systems, hardware). Comprehensive-Guide-To-Computer-Software-Types-Sectors-And-Emerging-Trends
  1. Perfective Maintenance
  • Enhances existing features and adds new ones based on user feedback.
  1. Preventive Maintenance
  • Improves software reliability and performance by addressing potential issues before they become problems.

b. Software Updates

  1. Patches
  • Small updates that fix specific bugs or security vulnerabilities.
  • Often released as needed. Comprehensive-Guide-To-Computer-Software-Types-Sectors-And-Emerging-Trends
  1. Service Packs
  • Collections of patches and updates bundled together.
  • Typically released periodically (e.g., Windows Service Packs).
  1. Version Upgrades
  • Significant updates that add new features, improve performance, and enhance security.
  • Often released as new versions of the software (e.g., from Microsoft Office 2019 to Microsoft 365).

11. Software Security

Software security is a critical aspect of software development and maintenance, aimed at protecting software from threats and vulnerabilities.

a. Common Security Threats

  1. Malware
  • Malicious software designed to damage, disrupt, or gain unauthorized access to computer systems.
  • Types include viruses, worms, Trojans, ransomware, spyware.
  1. Phishing
  • Fraudulent attempts to obtain sensitive information by pretending to be a trustworthy entity.
  1. SQL Injection
  • A type of attack where malicious SQL code is inserted into a query to manipulate the database.
  1. Denial of Service (DoS)
  • Attacks that overwhelm a system with traffic, rendering it unusable.

b. Security Measures

  1. Encryption
  • Converts data into a code to prevent unauthorized access.
  • Essential for protecting sensitive information.
  1. Firewalls
  • Network security systems that monitor and control incoming and outgoing network traffic.
  1. Antivirus Software
  • Scans for and removes malware from computer systems.
  • Regular updates are crucial to stay protected against new threats.
  1. Multi-Factor Authentication (MFA)
  • Requires multiple forms of verification to access a system.
  • Enhances security by adding an extra layer of protection.
  1. Regular Software Updates
  • Keeping software up-to-date ensures it has the latest security patches and features.

12. Future of Software Development

The future of software development is shaped by several emerging technologies and trends:

a. Artificial Intelligence and Machine Learning

  • AI and ML are increasingly being integrated into software to provide advanced data analysis, predictive analytics, and automation. Comprehensive-Guide-To-Computer-Software-Types-Sectors-And-Emerging-Trends
  • Applications include virtual assistants, recommendation systems, and autonomous vehicles.

b. Quantum Computing

  • Quantum computing promises to revolutionize software development with its ability to solve complex problems much faster than classical computers. Comprehensive-Guide-To-Computer-Software-Types-Sectors-And-Emerging-Trends
  • Potential applications include cryptography, optimization, and drug discovery.

c. Edge Computing

  • Edge computing processes data closer to where it is generated, reducing latency and improving performance. Comprehensive-Guide-To-Computer-Software-Types-Sectors-And-Emerging-Trends
  • Important for IoT applications and real-time data processing.

d. Augmented Reality (AR) and Virtual Reality (VR)

  • AR and VR are creating immersive experiences for gaming, education, training, and remote work. Comprehensive-Guide-To-Computer-Software-Types-Sectors-And-Emerging-Trends
  • Continued advancements in these technologies will expand their applications.

e. Blockchain

  • Blockchain technology provides secure and transparent ways to record transactions.
  • Beyond cryptocurrencies, it has potential uses in supply chain management, voting systems, and identity verification.

f. DevOps

  • DevOps practices aim to improve collaboration between development and operations teams.
  • Focus on automation, continuous integration, and continuous delivery to accelerate software development and deployment.Comprehensive-Guide-To-Computer-Software-Types-Sectors-And-Emerging-Trends

Comprehensive-Guide-To-Computer-Software-Types-Sectors-And-Emerging-TrendsComprehensive-Guide-To-Computer-Software-Types-Sectors-And-Emerging-TrendsComprehensive-Guide-To-Computer-Software-Types-Sectors-And-Emerging-TrendsComprehensive-Guide-To-Computer-Software-Types-Sectors-And-Emerging-Trends

Table of Contents

Northern Arc Capital IPO Allotment Status: Full Company Details

The Northern Arc Capital IPO attracted significant attention from both institutional and retail investors. Let’s delve into the key details of the company, the IPO process, allotment status, and its business model. Northern Arc Capital IPO Allotment Status

1. Company Overview: Northern Arc Capital

Northern Arc Capital Limited is a financial services company in India that focuses on providing debt financing solutions. The company operates as a Non-Banking Financial Company (NBFC) and primarily offers loans to under-served segments of the market, including microfinance, small and medium enterprises (SMEs), agricultural enterprises, and affordable housing sectors. Their innovative approach focuses on providing access to debt capital for borrowers who traditionally lack access to mainstream financing options.

Key Business Areas:

  • Microfinance: Collaborates with microfinance institutions (MFIs) to extend loans to low-income households. Northern Arc Capital IPO Allotment Status
  • SME Finance: Provides financial products for small and medium-sized businesses.
  • Affordable Housing Finance: Offers loans to support housing in urban and semi-urban areas. Northern Arc Capital IPO Allotment Status
  • Agriculture: Specializes in providing loans for agricultural activities, particularly to farmers and small-scale enterprises.

Founded in 2008, Northern Arc has played a pivotal role in increasing access to credit in sectors that are generally considered high risk but essential for economic development.

2. IPO Overview

The Northern Arc Capital IPO opened for subscription from September 12, 2024, to September 14, 2024. The company offered 29,529,913 equity shares with a face value of ₹10 per share. The price band for the IPO was set between ₹249 and ₹263, with the company aiming to raise around ₹777 crore.

Key Points:

  • Price Band: ₹249 – ₹263 per share
  • Total Issue Size: ₹777 crore
  • Fresh Issue: ₹300 crore
  • Offer for Sale (OFS): ₹477 crore
  • Lot Size: 57 shares
  • Market Lot: Investors needed to apply for at least one lot of 57 shares (minimum investment ₹14,991), with further multiples thereafter.

The IPO was a mix of a fresh issue of shares and an Offer for Sale (OFS), where existing shareholders, including promoters, reduced their stake in the company.

3. IPO Subscription

The IPO saw overwhelming demand, particularly from institutional investors. The overall subscription was recorded at 110.91 times the shares offered:

  • Qualified Institutional Buyers (QIBs): 240.79 times
  • Non-Institutional Investors (NIIs): 97.12 times
  • Retail Individual Investors (RIIs): 31.08 times

This indicates that the IPO was highly oversubscribed across all investor categories, signaling strong market interest.

4. Allotment Status and Dates

The allotment status for Northern Arc Capital’s IPO was finalized on September 20, 2024. Investors who applied can check their allotment status via the following methods:

  • Registrar Website (KFin Technologies): You can visit the KFintech website and check the IPO allotment status by entering your application number, PAN, or Demat account details.
  • BSE Website: Visit the BSE IPO Allotment Status page and select “Equity” as the issue type. Then select “Northern Arc Capital” from the dropdown menu, enter your details, and view the allotment. Northern Arc Capital IPO Allotment Status
  • NSE Website: Similarly, you can check the status on the NSE website.

5. Listing Date

The shares of Northern Arc Capital are expected to be listed on September 24, 2024, on both the BSE and NSE. Investors who have been allotted shares will have them credited to their Demat accounts by September 23, 2024. In case of non-allotment, refunds will be initiated on September 21, 2024.

6. Grey Market Premium (GMP) and Expected Listing Gains

The Grey Market Premium (GMP) for Northern Arc Capital shares indicates strong listing gains. As of the latest data, the GMP is ₹128 per share, suggesting that the stock could list at around ₹391, which represents a premium of nearly 49% over the issue price of ₹263.

7. Financial Performance of the Company

Northern Arc Capital has a strong track record in the financial services space, with a focus on providing financing to underserved sectors. As of the latest financial data:

  • Revenue: The company recorded revenues of ₹1,320 crore in FY2023, a significant increase from previous years.
  • Profit After Tax (PAT): In FY2023, the company posted a net profit of ₹210 crore, showing consistent profitability. Northern Arc Capital IPO Allotment Status

The company’s financial metrics are strong, which, coupled with the high subscription rates, signals investor confidence. Northern Arc Capital IPO Allotment Status

8. Investment Risks and Opportunities

While Northern Arc Capital presents a lucrative opportunity, especially for those interested in companies that serve underserved financial markets, there are inherent risks:

  • Market Risk: Like all NBFCs, Northern Arc is subject to credit risk and market fluctuations. Economic downturns or regulatory changes could impact its business.
  • Concentration Risk: As the company focuses on niche markets such as microfinance and agriculture, it is more vulnerable to risks in those sectors.Northern Arc Capital IPO Allotment Status

However, the company’s solid financial performance, innovative business model, and high subscription numbers indicate strong investor sentiment.Northern Arc Capital IPO Allotment Status

Northern Arc Capital IPO Allotment Status: Full Company Details

The Northern Arc Capital IPO has generated significant interest in the market, with strong oversubscription across categories. With the allotment status finalized on September 20, 2024, and listing set for September 24, 2024, investors are eager to see how the stock performs, particularly given the strong Grey Market Premium. Northern Arc Capital’s unique position in the financial services industry, focusing on underserved sectors, makes it a promising investment for long-term growth. Northern Arc Capital IPO Allotment Status

Detailed Notes on Adobe Photoshop Tabs and Tools Menu

Introduction

Adobe Photoshop is a powerful image editing software used by professionals and enthusiasts for graphic design, photography, and digital art.Detailed Notes on Adobe Photoshop Tabs and Tools Menu Understanding its interface, including the tabs and tools menu, is essential for efficient workflow and effective use of the software. Adobe Photoshop Tabs and Tools Overview

Tabs in Adobe Photoshop

  1. File Tab
  • New (Ctrl+N): Create a new document.
  • Open (Ctrl+O): Open an existing document.
  • Close (Ctrl+W): Close the current document.
  • Save (Ctrl+S): Save the current document.
  • Save As (Shift+Ctrl+S): Save the current document with a new name or format.
  • Export: Export the document in various formats such as PNG, JPEG, GIF, etc.
  • Print (Ctrl+P): Print the current document.
  • File Info: Add metadata to the document.
  • Automate: Batch processing and scripting options.
  • Scripts: Run pre-written scripts for automated tasks.
  1. Edit Tab
  • Undo (Ctrl+Z): Undo the last action.
  • Redo (Shift+Ctrl+Z): Redo the last undone action.
  • Cut (Ctrl+X): Cut the selected area.
  • Copy (Ctrl+C): Copy the selected area.
  • Paste (Ctrl+V): Paste the copied or cut area.
  • Free Transform (Ctrl+T): Transform the selected area.
  • Fill (Shift+F5): Fill the selected area with color, pattern, or content-aware fill.
  • Content-Aware Fill: Automatically fill the selected area with surrounding content.
  • Stroke: Add a border to the selected area.
  • Preferences: Customize Photoshop settings.
  1. Image Tab
  • Mode: Change the color mode (RGB, CMYK, Grayscale, etc.).
  • Adjustments: Access various adjustment layers like Levels, Curves, Hue/Saturation, etc.
  • Auto Tone, Auto Contrast, Auto Color: Automatically adjust image tones, contrast, and color.
  • Image Size (Ctrl+Alt+I): Resize the image.
  • Canvas Size (Ctrl+Alt+C): Resize the canvas.
  • Crop (C): Crop the image.
  • Trim: Remove transparent or colored areas from the edges.
  • Reveal All: Reveal the entire canvas if parts are hidden.
  • Duplicate: Create a copy of the current image.
  • Apply Image: Apply one image to another.
  • Calculations: Combine two images using mathematical operations.
  1. Layer Tab
  • New: Create a new layer, group, or adjustment layer.
  • Duplicate Layer: Duplicate the selected layer.
  • Delete: Delete the selected layer.
  • Layer Style: Add styles like drop shadow, bevel, emboss, etc.
  • Smart Objects: Convert layers to smart objects for non-destructive editing.
  • Rasterize: Convert smart objects or text layers to pixel layers.
  • Merge Layers: Merge selected layers.
  • Flatten Image: Merge all layers into a single background layer.
  • Layer Mask: Add or apply a mask to a layer.
  • Vector Mask: Add a vector mask to a layer.
  • Clipping Mask: Use one layer to mask another.
  • Arrange: Change the stacking order of layers.
  1. Select Tab
  • All (Ctrl+A): Select the entire canvas.
  • Deselect (Ctrl+D): Deselect any selected area.
  • Reselect (Shift+Ctrl+D): Reselect the last selection.
  • Inverse (Shift+Ctrl+I): Invert the current selection.
  • Color Range: Select areas based on color similarity.
  • Modify: Modify the selection by expanding, contracting, feathering, etc.
  • Grow: Expand the selection to include adjacent areas with similar colors.
  • Similar: Select areas with similar colors to the currently selected area.
  • Transform Selection: Transform the selection boundary.
  • Refine Edge: Refine the edges of the selection for better accuracy.
  1. Filter Tab
  • Filter Gallery: Access various filters like Artistic, Brush Strokes, Distort, Sketch, etc.
  • Liquify: Manipulate pixels within the image.
  • Blur: Apply various blur effects.
  • Sharpen: Enhance the sharpness of the image.
  • Noise: Add or reduce noise.
  • Pixelate: Create pixelation effects.
  • Render: Generate various effects like clouds, lens flare, etc.
  • Stylize: Apply stylistic effects like emboss, find edges, etc.
  • Other: Access additional filters like custom, maximum, minimum, etc.
  1. View Tab
  • Proof Setup: Preview how the image will look in different color spaces.
  • Proof Colors: Toggle proof colors on or off.
  • Gamut Warning: Highlight colors that are out of gamut.
  • Zoom In (Ctrl++): Zoom into the image.
  • Zoom Out (Ctrl+-): Zoom out of the image.
  • Fit on Screen (Ctrl+0): Fit the entire image on the screen.
  • Actual Pixels (Ctrl+1): View the image at 100% zoom.
  • Extras (Ctrl+H): Show or hide extras like guides, grid, etc.
  • Show: Toggle the visibility of various elements like grid, guides, etc.
  • Snap: Snap elements to guides, grid, etc.
  • Screen Mode: Change the screen mode (Standard, Full Screen with Menu Bar, Full Screen).
  1. Window Tab
  • Arrange: Arrange the layout of open documents.
  • Workspace: Manage workspaces and reset to defaults.
  • Extensions: Access extensions and plugins.
  • Actions: Show or hide the Actions panel.
  • Adjustments: Show or hide the Adjustments panel.
  • Brushes: Show or hide the Brushes panel.
  • Character: Show or hide the Character panel.
  • Clone Source: Show or hide the Clone Source panel.
  • Color: Show or hide the Color panel.
  • History: Show or hide the History panel.
  • Layers: Show or hide the Layers panel.
  • Navigator: Show or hide the Navigator panel.
  • Paragraph: Show or hide the Paragraph panel.
  • Paths: Show or hide the Paths panel.
  • Styles: Show or hide the Styles panel.
  • Swatches: Show or hide the Swatches panel.
  • Tool Presets: Show or hide the Tool Presets panel.

Tools Menu in Adobe Photoshop

  1. Move Tool (V): Move selections, layers, and guides.
  2. Marquee Tools (M): Make rectangular, elliptical, single row, and single column selections.
  3. Lasso Tools (L): Make freehand, polygonal (straight-edged), and magnetic (snap-to) selections.
  4. Quick Selection Tool (W): Quickly “paint” a selection using an adjustable round brush tip.
  5. Magic Wand Tool (W): Selects similarly colored areas.
  6. Crop Tool (C): Crop the image.
  7. Slice Tool (C): Create slices in an image for web design.
  8. Eyedropper Tool (I): Sample colors from the image.
  9. 3D Material Eyedropper Tool (I): Sample material from a 3D model.
  10. Color Sampler Tool (I): Display color values for selected areas.
  11. Ruler Tool (I): Measure distances and angles.
  12. Note Tool (I): Add text notes to the image.
  13. Count Tool (I): Count objects in the image.
  14. Healing Brush Tool (J): Paint with a sample or pattern to repair imperfections.
  15. Patch Tool (J): Repair a selected area with pixels from another area or a pattern.
  16. Content-Aware Move Tool (J): Move a selected part of a picture and fill the hole left behind.
  17. Red Eye Tool (J): Remove red-eye in flash photos.
  18. Brush Tool (B): Paint with the selected brush.
  19. Pencil Tool (B): Draw hard-edged lines.
  20. Color Replacement Tool (B): Replace a selected color with a new color.
  21. Mixer Brush Tool (B): Simulate realistic painting techniques.
  22. Clone Stamp Tool (S): Paint with a sample of an image.
  23. Pattern Stamp Tool (S): Paint with a pattern.
  24. History Brush Tool (Y): Paint a copy of the selected state or snapshot into the current image window.
  25. Art History Brush Tool (Y): Paint stylized strokes that simulate the look of different paint styles.
  26. Eraser Tool (E): Erase pixels in the layer.
  27. **Background Eraser Tool (

E)**: Erase areas to transparency by dragging.

  1. Magic Eraser Tool (E): Erase solid-colored areas to transparency with a single click.
  2. Gradient Tool (G): Create a gradual blend between multiple colors.
  3. Paint Bucket Tool (G): Fill similarly colored areas with the foreground color.
  4. 3D Material Drop Tool (G): Drop the material loaded in the tool onto the targeted area of a 3D object.
  5. Blur Tool (R): Blur parts of the image.
  6. Sharpen Tool (R): Sharpen parts of the image.
  7. Smudge Tool (R): Smudge parts of the image.
  8. Dodge Tool (O): Lighten areas of the image.
  9. Burn Tool (O): Darken areas of the image.
  10. Sponge Tool (O): Change the color saturation of areas.
  11. Pen Tool (P): Create precise paths that can be converted into selections.
  12. Freeform Pen Tool (P): Draw paths freehand.
  13. Add Anchor Point Tool (P): Add anchor points to paths.
  14. Delete Anchor Point Tool (P): Remove anchor points from paths.
  15. Convert Point Tool (P): Convert anchor points.
  16. Horizontal Type Tool (T): Create horizontal text.
  17. Vertical Type Tool (T): Create vertical text.
  18. Horizontal Type Mask Tool (T): Create a selection in the shape of horizontal text.
  19. Vertical Type Mask Tool (T): Create a selection in the shape of vertical text.
  20. Path Selection Tool (A): Select paths.
  21. Direct Selection Tool (A): Select path segments and anchor points.
  22. Rectangle Tool (U): Draw rectangular shapes.
  23. Rounded Rectangle Tool (U): Draw rounded rectangular shapes.
  24. Ellipse Tool (U): Draw elliptical shapes.
  25. Polygon Tool (U): Draw polygonal shapes.
  26. Line Tool (U): Draw lines.
  27. Custom Shape Tool (U): Draw custom shapes.
  28. Hand Tool (H): Move the image within its window.
  29. Rotate View Tool (R): Rotate the canvas.
  30. Zoom Tool (Z): Zoom in and out of the image.
  31. Default Foreground and Background Colors (D): Reset the foreground and background colors to default (black and white).
  32. Switch Foreground and Background Colors (X): Switch the foreground and background colors.
  33. Quick Mask Mode (Q): Enter or exit Quick Mask Mode.
  34. Edit in Quick Mask Mode (Q): Edit selections using a temporary mask.

Sure, here’s a concise version:

Adobe Photoshop Tabs and Tools Overview

Tabs

  1. File
  • New (Ctrl+N): Create a new document.
  • Open (Ctrl+O): Open an existing document.
  • Save (Ctrl+S): Save the document.
  • Export: Export in various formats (PNG, JPEG, etc.).
  • Print (Ctrl+P): Print the document.
  1. Edit
  • Undo (Ctrl+Z): Undo the last action.
  • Cut (Ctrl+X), Copy (Ctrl+C), Paste (Ctrl+V): Clipboard functions.
  • Free Transform (Ctrl+T): Transform selected area.
  • Preferences: Customize settings.
  1. Image
  • Mode: Change color mode (RGB, CMYK, etc.).
  • Adjustments: Levels, Curves, Hue/Saturation, etc.
  • Image Size (Ctrl+Alt+I): Resize image.
  • Canvas Size (Ctrl+Alt+C): Resize canvas.
  • Crop (C): Crop the image.
  1. Layer
  • New: Create new layers.
  • Layer Style: Add styles (drop shadow, etc.).
  • Smart Objects: Non-destructive editing.
  • Merge Layers: Combine layers.
  • Layer Mask: Add or apply masks.
  1. Select
  • All (Ctrl+A), Deselect (Ctrl+D), Inverse (Shift+Ctrl+I): Selection tools.
  • Color Range: Select by color similarity.
  • Refine Edge: Improve selection edges.
  1. Filter
  • Filter Gallery: Artistic, Brush Strokes, etc.
  • Liquify: Manipulate pixels.
  • Blur, Sharpen, Noise: Various effects.
  1. View
  • Zoom In (Ctrl++), Zoom Out (Ctrl+-): Zoom controls.
  • Fit on Screen (Ctrl+0): Fit image to screen.
  • Guides, Grid, Snap: Alignment tools.
  1. Window
  • Arrange, Workspace: Manage document layout.
  • Panels: Show/hide (Layers, Brushes, History, etc.).

Tools

  1. Move Tool (V)
  2. Marquee Tools (M)
  3. Lasso Tools (L)
  4. Quick Selection Tool (W)
  5. Crop Tool (C)
  6. Eyedropper Tool (I)
  7. Healing Brush Tool (J)
  8. Brush Tool (B)
  9. Clone Stamp Tool (S)
  10. History Brush Tool (Y)
  11. Eraser Tool (E)
  12. Gradient Tool (G)
  13. Blur Tool (R)
  14. Dodge Tool (O)
  15. Pen Tool (P)
  16. Type Tool (T)
  17. Path Selection Tool (A)
  18. Shape Tools (U)
  19. Hand Tool (H)
  20. Zoom Tool (Z)

Conclusion

This overview of Photoshop’s tabs and tools menu provides a quick reference to its core functions, facilitating efficient workflow and effective use of the software for various image editing tasks.

Adobe Photoshop: Latest Tips and Techniques

To keep up with the latest tips and techniques in Adobe Photoshop, it’s essential to stay updated with new features, shortcuts, and creative methods that can enhance your workflow and output. Here are some recent tips and advanced techniques to get the most out of Photoshop:

1. Utilize the Latest Features

Adobe regularly updates Photoshop with new features and enhancements. Keeping your software up to date ensures you have access to the latest tools and capabilities.

  • Neural Filters: These AI-powered filters can perform tasks like skin smoothing, style transfer, and even facial expression changes. To access them, go to Filter > Neural Filters.
  • Sky Replacement: Quickly replace the sky in your photos with different presets or your own images. Access it via Edit > Sky Replacement.
  • Pattern Preview: Design seamless patterns easily with this feature. Enable it through View > Pattern Preview.

2. Smart Objects for Non-Destructive Editing

Using Smart Objects allows you to edit layers non-destructively. You can resize, apply filters, and make other adjustments without permanently altering the original image.

  • Convert a Layer to a Smart Object: Right-click on the layer and choose Convert to Smart Object.
  • Edit Contents: Double-click the Smart Object thumbnail to edit the contents.

3. Adjustment Layers for Non-Destructive Adjustments

Instead of applying adjustments directly to your image, use adjustment layers. This way, you can tweak or remove adjustments at any time.

  • Create an Adjustment Layer: Go to Layer > New Adjustment Layer and choose the type of adjustment (e.g., Levels, Curves, Hue/Saturation).

4. Layer Masks for Precision Editing

Layer masks allow you to hide or reveal parts of a layer, offering precise control over your edits.

  • Add a Layer Mask: Select the layer and click the Add Layer Mask button at the bottom of the Layers panel.
  • Paint with Black/White: Use the Brush Tool (B) to paint with black to hide parts of the layer and white to reveal them.

5. Use Blend Modes for Creative Effects

Blend modes change how layers interact with each other, enabling various creative effects.

  • Experiment with Blend Modes: Select a layer and choose different blend modes from the drop-down menu at the top of the Layers panel. Commonly used blend modes include Multiply, Screen, Overlay, and Soft Light.

6. Keyboard Shortcuts for Efficiency

Mastering keyboard shortcuts can significantly speed up your workflow.

  • Common Shortcuts:
  • Ctrl+J: Duplicate Layer
  • Ctrl+T: Free Transform
  • B: Brush Tool
  • E: Eraser Tool
  • L: Lasso Tool
  • M: Marquee Tool
  • V: Move Tool
  • Z: Zoom Tool

7. Content-Aware Fill and Scale

Photoshop’s content-aware tools can help you fill in gaps or resize images without distorting key elements.

  • Content-Aware Fill: Select an area and go to Edit > Content-Aware Fill to fill it with surrounding pixels.
  • Content-Aware Scale: Go to Edit > Content-Aware Scale to resize images while protecting important content.

8. Brush Settings for Custom Effects

Customizing brush settings can help you create unique effects and textures.

  • Brush Settings Panel: Access it by selecting the Brush Tool (B) and clicking on the Brush Settings icon in the options bar.
  • Adjust Settings: Modify properties like size, shape, hardness, and spacing.

9. Creative Cloud Libraries for Asset Management

Use Creative Cloud Libraries to store and organize your assets, such as colors, brushes, and graphics, and access them across Adobe apps.

  • Access Libraries: Go to Window > Libraries to open the Libraries panel.

10. Layer Comps for Multiple Layouts

Layer comps allow you to create multiple versions of a layout within a single document, making it easy to switch between different design ideas.

  • Create a Layer Comp: Go to Window > Layer Comps and click the New Layer Comp button.

11. Use the Discover Panel for Help and Tutorials

Photoshop’s Discover panel offers tips, tutorials, and quick actions to help you learn new techniques and solve problems.

  • Open Discover Panel: Press Ctrl+F or go to Help > Photoshop Help.

Conclusion

These tips and techniques can enhance your Photoshop skills and help you stay up-to-date with the latest features. By incorporating these practices into your workflow, you can work more efficiently and creatively.

Conclusion

Detailed Notes on Adobe Photoshop Tabs and Tools MenuDetailed Notes on Adobe Photoshop Tabs and Tools MenuDetailed Notes on Adobe Photoshop Tabs and Tools MenuDetailed Notes on Adobe Photoshop Tabs and Tools MenuDetailed Notes on Adobe Photoshop Tabs and Tools MenuDetailed Notes on Adobe Photoshop Tabs and Tools MenuDetailed Notes on Adobe Photoshop Tabs and Tools MenuDetailed Notes on Adobe Photoshop Tabs and Tools MenuDetailed Notes on Adobe Photoshop Tabs and Tools MenuDetailed Notes on Adobe Photoshop Tabs and Tools MenuDetailed Notes on Adobe Photoshop Tabs and Tools MenuDetailed Notes on Adobe Photoshop Tabs and Tools MenuDetailed Notes on Adobe Photoshop Tabs and Tools MenuDetailed Notes on Adobe Photoshop Tabs and Tools MenuDetailed Notes on Adobe Photoshop Tabs and Tools MenuDetailed Notes on Adobe Photoshop Tabs and Tools MenuDetailed Notes on Adobe Photoshop Tabs and Tools MenuDetailed Notes on Adobe Photoshop Tabs and Tools MenuDetailed Notes on Adobe Photoshop Tabs and Tools MenuDetailed Notes on Adobe Photoshop Tabs and Tools MenuDetailed Notes on Adobe Photoshop Tabs and Tools MenuDetailed Notes on Adobe Photoshop Tabs and Tools MenuDetailed Notes on Adobe Photoshop Tabs and Tools MenuDetailed Notes on Adobe Photoshop Tabs and Tools MenuDetailed Notes on Adobe Photoshop Tabs and Tools MenuDetailed Notes on Adobe Photoshop Tabs and Tools MenuDetailed Notes on Adobe Photoshop Tabs and Tools MenuDetailed Notes on Adobe Photoshop Tabs and Tools MenuDetailed Notes on Adobe Photoshop Tabs and Tools MenuDetailed Notes on Adobe Photoshop Tabs and Tools Menu

Understanding vstETH: How Our Liquid Staking Token Enhances User Experience

Greetings Verse Community

We are excited to present a new proposal for the Verse Ecosystem.Understanding vstETH The recent approval by the U.S. Securities and Exchange Commission (SEC) of eight spot exchange-traded funds (ETFs) backed by Ethereum (ETH) has spurred significant interest from both institutional and retail investors. This growing enthusiasm for ETH has particularly amplified interest in ETH Staking.

Increased Interest in ETH Staking

The rise in interest in ETH Staking can be attributed to several factors: Understanding vstETH

  1. Ethereum’s Track Record
  • Ethereum has a history of successful network upgrades. Understanding vstETH
  1. Presence of Major Projects
  • Numerous large projects and brands operate on the Ethereum blockchain.
  1. Growth of Layer 2 and Layer 3 Solutions
  • An increasing number of Layer 2 and Layer 3 solutions are being built on Ethereum.

For users with substantial amounts of ETH (32 ETH or more, approximately US$109k) or experienced DeFi participants, staking ETH is straightforward. They can either deposit 32 ETH with a validator or use a pooled staking protocol. However, this poses a challenge for new crypto users, who represent the target audience of the Bitcoin self-custodial wallet app and the Verse Ecosystem. Understanding vstETH

Proposal

This proposal seeks to make ETH Staking more accessible and rewarding for new crypto users. The proposed plan includes:

  1. Pooled ETH Liquid Staking Vault
  • Setting up a pooled ETH liquid staking vault that allows users to deposit any amount of ETH and earn staking rewards.
  1. Integration with Verse Ecosystem
  • This feature will be integrated into verse.bitcoin and the Earn section of the Bitcoin self-custodial wallet app.Understanding vstETH
  1. Introduction of vstETH Tokens
  • Upon depositing ETH, users will receive vstETH (Verse staked ETH) liquid staking tokens representing their stake. The vstETH token will be integrated within the Verse Ecosystem and the Bitcoin self-custodial wallet app, enabling users to: Understanding vstETH
    • Trade vstETH on the Verse DEX
    • Stake vstETH in Verse Farms for additional rewards
    • Spend vstETH on Verse dApps (e.g., Verse Scratcher)
    • Send and receive vstETH Understanding vstETH

Pros and Cons

ProsCons
Simplifies ETH Staking for new users within the Bitcoin mobile app and Verse Ecosystem.Resources could be allocated to other projects instead.
Retains users within the Verse Ecosystem through the use of vstETH.The ETH Staking feature may not attract new users or engage existing users as anticipated.
Positions us strategically in the ETH Staking narrative if executed timely.

Voting Options

  • Option 1: Yes, proceed with the proposal.
  • Option 2: No, do not proceed with the proposal.

Each option has its own set of advantages and considerations. The community’s decision will be based on the perceived benefits and risks associated with each choice. Your participation in this decision is crucial for shaping the future of the Verse Ecosystem. Understanding vstETH

Voting Period

The voting period for this proposal will begin on July 23 at 2:00 UTC and end on July 29 at 2:00 UTC. We encourage all members of the Verse community to express their preferences and actively participate in this important decision. Understanding vstETH

How to Vote

To vote, you need VERSE. You can obtain VERSE in the wallet app, on the Verse DEX, or on KuCoin Exchange. Understanding vstETH

Discussion

To share your thoughts, suggestions, and feedback on the proposal, please join the conversation in the Verse Lounge, our verified community Telegram group. Visit [link] to connect and contribute to the dialogue.Understanding vstETH

Your involvement is vital to the direction of the Verse Ecosystem. We appreciate your commitment and look forward to your input! Understanding vstETH

Thank you for being a valuable part of the Verse journey. Together, let’s achieve great things!

Understanding ETH Staking

What is ETH Staking?

ETH Staking involves participating in the Ethereum 2.0 network upgrade by locking up ETH to support network operations such as transaction validation and block creation. In return, stakers receive rewards in the form of additional ETH. This process is a key part of Ethereum’s transition from a Proof of Work (PoW) to a Proof of Stake (PoS) consensus mechanism. Understanding vstETH

How ETH Staking Works

  1. Deposit ETH:
  • Users lock up their ETH in the staking protocol.
  1. Become a Validator:
  • Validators are selected to propose and validate blocks based on the amount of ETH staked.
  1. Earn Rewards:
  • Validators earn rewards for their participation, which are distributed in the form of additional ETH.

Benefits of ETH Staking

  • Passive Income:
  • Earn rewards while holding and staking ETH. Understanding vstETH
  • Network Security:
  • Contribute to the security and stability of the Ethereum network.
  • Reduced Environmental Impact:
  • PoS is more energy-efficient compared to PoW. Understanding vstETH

How vstETH Enhances User Experience

Features of vstETH

  1. Liquidity:
  • vstETH provides liquidity by allowing users to trade their staked assets on the Verse DEX.
  1. Additional Rewards:
  • Users can earn extra rewards by staking vstETH in Verse Farms.
  1. Integration with Verse dApps:
  • Spend or utilize vstETH across various Verse applications.

Advantages for New Crypto Users

  • Accessibility:
  • Allows new users to participate in staking without needing to deposit 32 ETH.
  • Simplicity:
  • Simplifies the staking process with easy-to-use features in the Verse Ecosystem.
  • Engagement:
  • Encourages ongoing engagement with the Verse Ecosystem through various staking options and rewards.

Strategic Importance of ETH Staking

  1. Institutional Interest:
  • Increasing institutional investment in ETH following the SEC’s approval of ETFs.
  1. User Growth:
  • Rising number of retail and institutional users interested in ETH Staking.

Competitive Advantage

  • Early Adoption:
  • Positioning Verse ahead of competitors by offering a streamlined staking solution.
  • Ecosystem Integration:
  • Leveraging the existing Verse Ecosystem to enhance user experience and retention.

Potential Challenges and Mitigation Strategies

Technical and Operational Challenges

  • Scalability:
  • Ensuring the staking platform can handle a growing number of users and transactions.
  • Security:
  • Implementing robust security measures to protect users’ staked ETH and vstETH tokens.

Mitigation Strategies

  • Development and Testing:
  • Conduct thorough testing and development to address potential scalability and security issues.
  • User Support:
  • Providing comprehensive support and educational resources for users to understand and navigate the staking process.

Community Engagement

How to Get Involved

  • Participate in Discussions:
  • Join the Verse Lounge on Telegram to share your thoughts and feedback.
  • Stay Informed:
  • Follow updates and announcements on the Verse website and social media channels.
  • Vote on Proposals:
  • Use your VERSE tokens to cast your vote and influence the direction of the Verse Ecosystem.

Additional Resources

  • Educational Materials:
  • Access guides and tutorials on ETH Staking and using vstETH within the Verse Ecosystem.
  • Support Channels:
  • Reach out to our support team for assistance with any questions or issues related to the staking feature.

Conclusion

The proposed ETH Staking feature represents a significant opportunity for both new and experienced crypto users to participate in Ethereum’s network and benefit from staking rewards. We encourage all members of the Verse community to actively participate in the voting process and engage in discussions to help shape the future of the Verse Ecosystem.

Thank you for your continued support and involvement!

Benefits of Tally Prime

Tally Prime, the latest version of the popular accounting software, offers numerous benefits for businesses of all sizes. Whether you’re a small business owner, accountant, or part of a large enterprise, Tally Prime simplifies financial management and increases productivity. Here’s a look at the key benefits of using Tally Prime: Benefits of Tally Prime

1. Simplified GST Compliance

Tally Prime makes Goods and Services Tax (GST) management easy by automating tasks like tax calculation, invoice generation, and GST return filing (GSTR-1 and GSTR-3B). This ensures accurate tax compliance, reducing the chances of penalties or errors. Benefits of Tally Prime

2. Efficient Multi-Tasking

With its advanced multi-tasking feature, Tally Prime allows users to manage multiple functions at once. You can easily switch between different reports, invoices, and screens without closing previous windows, saving time and boosting efficiency. Benefits of Tally Prime

3. Comprehensive Business Reports

Tally Prime generates detailed business reports such as Profit & Loss (P&L), Balance Sheet, Cash Flow, and Stock Summary. These reports help in assessing your financial health, identifying trends, and making informed business decisions. Benefits of Tally Prime

4. Inventory Management

Tally Prime enables businesses to manage their inventory efficiently by tracking stock levels, reorder points, and stock movement. It provides real-time updates on inventory status, preventing stock shortages or overstocking, and helping with better inventory control.

5. Improved User Experience

The user-friendly interface of Tally Prime ensures that even non-accounting professionals can navigate the software with ease. Its simple and clean design minimizes errors and allows quick access to important features, making business operations smoother.

6. Faster Data Processing

Tally Prime is known for its speed. It processes transactions quickly, allowing businesses to enter data, generate invoices, and create reports without delays. This real-time data processing helps businesses stay updated on their financial status.

7. Remote Access

With Tally Prime’s remote access feature, business owners and accountants can access their data from anywhere, anytime. This is especially beneficial for businesses with multiple locations or for professionals who need flexibility to work remotely. Benefits of Tally Prime

8. Cost-Effective Solution

Tally Prime offers great value for money. It’s affordable for businesses of all sizes and provides an all-in-one solution that covers accounting, inventory, payroll, and compliance needs, reducing the need for multiple software systems. Benefits of Tally Prime

9. Secure Data Management

Tally Prime ensures your business data is safe with advanced security features like data encryption and user-based access control. Only authorized users can access sensitive financial data, providing peace of mind and enhanced data protection.

10. Automated Bank Reconciliation

Tally Prime makes bank reconciliation hassle-free by automatically reconciling your bank statements with your accounting records. This ensures that your books match with your bank balance, saving time and reducing errors in financial reporting.

11. Customizable for Business Needs

Tally Prime is highly customizable, allowing businesses to tailor the software to meet their specific needs. Whether it’s for creating custom invoices or generating unique reports, Tally Prime can be configured to suit your business operations.

12. Scalability for Growing Businesses

Tally Prime grows with your business. As your business expands, Tally Prime can handle more transactions, users, and operations without compromising performance. This makes it suitable for both small businesses and large enterprises.

13. Multi-Currency and Language Support

For businesses dealing with international clients, Tally Prime supports multi-currency transactions and can generate invoices in different currencies. It also offers multi-language support, helping businesses cater to a diverse clientele.

14. Payroll Management

Tally Prime simplifies payroll management by automating salary calculations, tax deductions (like PF and ESI), and generating payslips. This makes it easier for businesses to manage employee payments and statutory compliance.

15. Tally Prime’s Regular Updates

Tally Prime regularly receives updates to ensure compliance with the latest tax laws and technological advancements. This ensures that users are always equipped with the best tools for business management and remain compliant with the latest regulations.

Conclusion

Tally Prime is a powerful, comprehensive solution that offers a range of benefits for businesses of all sizes. From simplifying GST compliance and inventory management to providing remote access and secure data management, Tally Prime helps businesses run efficiently and cost-effectively. With its user-friendly interface, powerful reporting tools, and scalability, Tally Prime is the perfect software for businesses aiming to streamline their financial operations and stay competitive in today’s fast-paced environment.

Start using Tally Prime to experience these benefits and take your business to the next level!

Benefits of Tally Prime

स्वास्थ्य बीमा में डिजिटल ट्रांसफॉर्मेशन के 2024 के टॉप ट्रेंड्स |Top Digital Transformation Trends in Health Insurance for 2024

Transformation Trends in Health Insurance स्वास्थ्य बीमा में डिजिटल ट्रांसफॉर्मेशन तेजी से विकसित हो रहा है, जिससे ग्राहकों और कंपनियों के लिए कई सुविधाएं और बदलाव आ रहे हैं। 2024 में, कुछ प्रमुख डिजिटल ट्रेंड्स ने स्वास्थ्य बीमा के क्षेत्र को नया आकार दिया है:

1. टेलीमेडिसिन और टेलीहेल्थ सेवाएं:

  • महामारी के बाद, टेलीमेडिसिन का इस्तेमाल स्वास्थ्य बीमा योजनाओं में बहुत बढ़ा है। इससे लोग अपने डॉक्टर से वर्चुअल परामर्श ले सकते हैं, जो बीमा योजनाओं में भी कवर होता है। यह सेवा रोगियों और बीमाधारकों दोनों के लिए किफायती और समय-संवेदनशील साबित हो रही है।

2. आर्टिफिशियल इंटेलिजेंस (AI) और मशीन लर्निंग (ML):

  • बीमा कंपनियां AI और ML का उपयोग कर स्वास्थ्य जोखिमों का विश्लेषण करती हैं और प्रीमियम तय करने के लिए व्यक्तिगत डेटा का उपयोग करती हैं। यह प्रणाली न केवल क्लेम प्रक्रिया को तेज करती है, बल्कि धोखाधड़ी के मामलों को भी कम करती है।

3. ब्लॉकचेन टेक्नोलॉजी:

  • ब्लॉकचेन का इस्तेमाल डेटा सुरक्षा को बढ़ाने और क्लेम्स की पारदर्शिता बनाए रखने के लिए किया जा रहा है। यह तकनीक डेटा को सुरक्षित और वेरिफिकेशन की प्रक्रिया को तेज करने में मदद करती है।

4. वियरेबल टेक्नोलॉजी और IoT (इंटरनेट ऑफ थिंग्स):

  • फिटनेस बैंड्स और अन्य वियरेबल डिवाइस के जरिए स्वास्थ्य डेटा को बीमा योजनाओं में इंटीग्रेट किया जा रहा है। यह बीमा कंपनियों को बीमाधारकों के स्वास्थ्य संबंधी पैटर्न को ट्रैक करने और उन्हें बेहतर बीमा प्लान प्रदान करने में मदद करता है।

5. मोबाइल ऐप और पोर्टल्स:

  • बीमा कंपनियां ग्राहकों के लिए मोबाइल ऐप और ऑनलाइन पोर्टल्स लॉन्च कर रही हैं, जहां ग्राहक आसानी से क्लेम्स फाइल कर सकते हैं, पॉलिसी डिटेल्स देख सकते हैं, और हेल्थ चेकअप्स की जानकारी प्राप्त कर सकते हैं। Transformation Trends in Health Insurance

6. पर्सनलाइज्ड हेल्थ बीमा योजनाएं:

  • डिजिटल टेक्नोलॉजी के इस्तेमाल से बीमा कंपनियां व्यक्तिगत जरूरतों और बीमाधारकों के स्वास्थ्य रिकॉर्ड के आधार पर पर्सनलाइज्ड पॉलिसी बना रही हैं। यह ग्राहकों को बेहतर सुरक्षा और कम प्रीमियम के विकल्प देती है।

7. क्लाउड-आधारित समाधान:

  • क्लाउड टेक्नोलॉजी का उपयोग डेटा स्टोरेज और प्रोसेसिंग को आसान और सुरक्षित बनाने के लिए किया जा रहा है। इससे बीमा कंपनियों को बड़े पैमाने पर डेटा हैंडलिंग और क्लेम प्रोसेसिंग में मदद मिल रही है। Transformation Trends in Health Insurance

8. पेपरलेस प्रोसेस:

निष्कर्ष: स्वास्थ्य बीमा में डिजिटल ट्रांसफॉर्मेशन ग्राहकों के लिए एक बड़ा फायदा साबित हो रहा है। इससे न केवल बीमा प्रक्रियाएं आसान हुई हैं, बल्कि ग्राहकों को बेहतर सेवाएं और अधिक किफायती विकल्प भी उपलब्ध हो रहे हैं।Transformation Trends in Health Insurance

स्वास्थ्य बीमा में डिजिटल ट्रांसफॉर्मेशन के कुछ और महत्वपूर्ण ट्रेंड्स जो 2024 में उभर रहे हैं, उन्हें समझना जरूरी है ताकि बीमाधारक और बीमा कंपनियां इस बदलाव से लाभान्वित हो सकें:

9. रियल-टाइम डेटा एनालिटिक्स:

  • बीमा कंपनियां रियल-टाइम डेटा एनालिटिक्स का इस्तेमाल कर रही हैं ताकि बीमाधारकों के स्वास्थ्य की सटीक जानकारी प्राप्त की जा सके। इससे न केवल बीमा पॉलिसी को ज्यादा सटीक बनाया जा रहा है, बल्कि संभावित बीमारियों का पूर्वानुमान भी किया जा सकता है। Transformation Trends in Health Insurance

10. वर्चुअल असिस्टेंट और चैटबॉट्स:

  • बीमा कंपनियों ने अपने कस्टमर केयर सेवाओं में चैटबॉट्स और वर्चुअल असिस्टेंट्स का उपयोग करना शुरू कर दिया है। ये एआई-बेस्ड असिस्टेंट्स तुरंत और 24/7 सेवाएं प्रदान करते हैं, जिससे बीमाधारकों की समस्याओं का तेजी से समाधान होता है। Transformation Trends in Health Insurance

11. डायग्नोस्टिक और उपचार सेवाओं का इंटीग्रेशन:

  • बीमा योजनाओं में डायग्नोस्टिक और उपचार सेवाओं को भी इंटीग्रेट किया जा रहा है, जिससे बीमाधारक बीमा कंपनी के साथ मिलकर अपनी स्वास्थ्य जांच और इलाज को भी योजनाबद्ध तरीके से कर सकते हैं।

12. संवर्धित वास्तविकता (AR) और आभासी वास्तविकता (VR):

  • भविष्य में, कुछ बीमा कंपनियां ग्राहकों को AR/VR टेक्नोलॉजी के माध्यम से उनकी स्वास्थ्य स्थिति और बीमा योजनाओं की बारीकियों को समझने में मदद कर सकती हैं। यह शिक्षा और जागरूकता को बढ़ाने के साथ-साथ बेहतर निर्णय लेने में भी सहायक हो सकता है। Transformation Trends in Health Insurance

13. डिजिटल कस्टमर अनुभव को बढ़ावा:

  • ग्राहकों को एक सहज और बिना रुकावट का अनुभव देने के लिए बीमा कंपनियां अपने डिजिटल प्लेटफॉर्म को बेहतर बना रही हैं। यूजर-फ्रेंडली मोबाइल ऐप्स और वेबसाइट्स के माध्यम से बीमाधारक आसानी से पॉलिसी से जुड़ी जानकारी देख सकते हैं, भुगतान कर सकते हैं, और क्लेम दर्ज कर सकते हैं।

14. हेल्थकेयर पार्टनरशिप:

  • स्वास्थ्य बीमा कंपनियां अब हेल्थकेयर प्रदाताओं के साथ साझेदारी कर रही हैं ताकि वे बीमाधारकों को बेहतर स्वास्थ्य सेवाएं प्रदान कर सकें। उदाहरण के लिए, बीमाधारकों को अस्पतालों, क्लीनिकों और फार्मेसियों में कैशलेस सेवाएं प्रदान की जाती हैं। Transformation Trends in Health Insurance

15. हाइब्रिड बीमा मॉडल्स:

  • बीमा कंपनियां अब हाइब्रिड मॉडल्स अपना रही हैं, जहां वे पारंपरिक स्वास्थ्य बीमा के साथ-साथ डिजिटल सेवाओं को भी जोड़ रही हैं। इससे बीमाधारकों को अधिक लचीलापन और विकल्प मिलते हैं, जिससे वे अपनी जरूरतों के अनुसार सही योजना चुन सकते हैं। Transformation Trends in Health Insurance Transformation Trends in Health Insurance

16. धोखाधड़ी की रोकथाम:

  • ब्लॉकचेन और AI जैसी तकनीकों के उपयोग से, बीमा कंपनियां अब धोखाधड़ी को पहचानने और रोकने में सक्षम हो रही हैं। इससे बीमाधारक और बीमा कंपनियां दोनों सुरक्षित महसूस कर सकते हैं, क्योंकि यह सिस्टम पारदर्शिता और विश्वास को बढ़ावा देता है।bvTransformation Trends in Health Insurance

निष्कर्ष:

डिजिटल ट्रांसफॉर्मेशन ने स्वास्थ्य बीमा उद्योग को न केवल अधिक प्रभावी और किफायती बनाया है, बल्कि इसने इसे ग्राहकों के लिए अधिक अनुकूल और सुलभ भी किया है। आने वाले वर्षों में, डिजिटल ट्रेंड्स और भी उन्नत होंगे, जिससे बीमा उद्योग में नए बदलाव देखने को मिलेंगे।

Kawasaki Ninja 400: Price, Performance,Features, and Ownership Experience

Kawasaki Ninja 400 Price

भारतीय बाजार में एक रेसिंग बाइक चर्चा में है, जिसका नाम कावासाकी निंजा है। Kawasaki Ninja 400: Price यह एक 400 सीसी सेगमेंट की बेहद शानदार बाइक है, जो भारतीय बाजार में 1 वेरिएंट और 2 कलर ऑप्शंस के साथ उपलब्ध है। इस बाइक में BS6 का पावरफुल इंजन दिया गया है, जो इसे 24 किलोमीटर प्रति लीटर तक का बेहतरीन माइलेज देता है। आगे इस रेसिंग बाइक की और जानकारी दी गई है।

Kawasaki Ninja 400 On-Road Price

इस बाइक के ऑन-रोड कीमत की बात करें तो यह 1 वेरिएंट में आती है, जिसकी कीमत 5,97,824 लाख रुपये है। इसमें 2 कलर ऑप्शन मिलते हैं, जैसे कि लाइम ग्रीन और कार्बन ग्रे। बाइक का कुल वजन 168 किलो है, और इसकी सीट हाइट 788 मिमी है।Kawasaki Ninja 400: Price

Specifications:

  • Engine Capacity: 399 cc
  • Mileage (ARAI): 26.7 kmpl
  • Transmission: 6-स्पीड मैनुअल
  • Kerb Weight: 168 kg
  • Fuel Tank Capacity: 14 लीटर
  • Seat Height: 785 मिमी

Kawasaki Ninja 400 Features

इस बाइक के फीचर्स की बात करें तो इसमें कई एडवांस फीचर्स दिए गए हैं। इसमें अनलॉग इंस्ट्रूमेंट कंसोल, अनलॉग स्पीडोमीटर, अनलॉग टैकोमीटर, अनलॉग ट्रिप मीटर और ओडोमीटर जैसे फीचर्स शामिल हैं। इसके अतिरिक्त, बाइक में एलईडी हेडलाइट, एलईडी टेल लाइट, टर्न सिग्नल लैंप्स और बॉडी ग्राफिक्स भी दिए गए हैं। Kawasaki Ninja 400: Price

Feature List:

  • Instrument Console:
  • स्पीडोमीटर: अनलॉग
  • टैकोमीटर: डिजिटल
  • ट्रिपमीटर: डिजिटल
  • ओडोमीटर: डिजिटल
  • फ्यूल गेज: डिजिटल
  • Additional Features:
  • Forced lubrication wet sump
  • Rake: 24.7°
  • Trail: 92 मिमी
  • Adjustable Windscreen
  • Body Graphics
  • Seat and Footrest:
  • Seat Type: Split
  • Passenger Footrest

Kawasaki Ninja 400 Engine Specifications

कावासाकी निंजा 400 में 399 सीसी का लिक्विड कूल्ड, 4-स्ट्रोक पैरेलल ट्विन इंजन दिया गया है, जो 45 PS की पावर और 10,000 rpm की मैक्स पावर जनरेट करता है। यह इंजन 37 Nm की मैक्स टॉर्क 8000 rpm पर उत्पन्न करता है। बाइक में 6-स्पीड गियर बॉक्स है। इसमें 14 लीटर की फ्यूल टैंक कैपेसिटी दी गई है और यह 24 किलोमीटर प्रति लीटर तक का माइलेज देती है। इस इंजन के साथ, बाइक की टॉप स्पीड 105 mph है। Kawasaki Ninja 400: Price

Kawasaki Ninja 400 Suspension and Brakes

इस बाइक के सस्पेंशन और ब्रेकिंग सिस्टम में आगे टेलीस्कोपिक फोर्क सस्पेंशन और पीछे स्विंगआर्म सस्पेंशन दिया गया है। ब्रेकिंग के लिए, दोनों पहियों पर डिस्क ब्रेक्स की सुविधा दी गई है। Kawasaki Ninja 400: Price

Kawasaki Ninja 400 Rivals

भारतीय बाजार में कावासाकी निंजा 400 का मुकाबला Aprilia RS 457, KTM Duke 390, और MT-03 जैसी बेहतरीन बाइक्स से होता है। Kawasaki Ninja 400: Price

Kawasaki Ninja 400 Performance and Handling

कावासाकी निंजा 400 न केवल अपनी स्टाइलिंग के लिए बल्कि परफॉरमेंस और हैंडलिंग के लिए भी जानी जाती है। इस बाइक का वजन बहुत कम है, जिससे इसे कंट्रोल करना आसान हो जाता है, खासकर उच्च गति पर। बाइक का 399 सीसी इंजन तीव्र एक्सेलेरेशन प्रदान करता है, जिससे यह हाईवे पर भी एक शानदार प्रदर्शन करती है। इसके अलावा, निंजा 400 की एरोडायनामिक डिज़ाइन इसे हवा के प्रतिरोध को कम करने में मदद करती है, जिससे उच्च गति पर स्थिरता बनाए रखना आसान हो जाता है। Kawasaki Ninja 400: Price

Kawasaki Ninja 400 Comfort and Ergonomics

कावासाकी निंजा 400 में आराम को प्राथमिकता दी गई है, जिससे लंबे समय तक राइडिंग के दौरान भी यह बाइक आरामदायक रहती है। इसकी स्प्लिट सीट डिज़ाइन राइडर और पिलियन दोनों के लिए पर्याप्त आराम प्रदान करती है। इसके अलावा, बाइक की सीट हाइट 785 मिमी होने के कारण विभिन्न ऊंचाई वाले राइडर इसे आसानी से संभाल सकते हैं। हैंडलबार की पोजिशन और फुटपेग की प्लेसमेंट भी इस तरह से डिज़ाइन की गई है कि राइडर को एक स्पोर्टी लेकिन आरामदायक राइडिंग पोजिशन मिल सके। Kawasaki Ninja 400: Price

Kawasaki Ninja 400 Maintenance and Service

कावासाकी निंजा 400 के मालिकों को ध्यान रखना चाहिए कि इस बाइक की नियमित सर्विसिंग इसकी परफॉरमेंस को बनाए रखने के लिए महत्वपूर्ण है। कावासाकी की ओर से अधिकृत सर्विस सेंटर्स पर इसे सर्विस कराना ही बेहतर होता है, जहां एक्सपर्ट्स द्वारा इसका इंजन, ब्रेक्स, सस्पेंशन, और अन्य महत्वपूर्ण हिस्सों की जांच की जाती है। इस बाइक की मेंटेनेंस लागत अन्य प्रीमियम बाइक्स के मुकाबले अपेक्षाकृत कम है, लेकिन इसका ध्यान रखना आवश्यक है ताकि यह लंबे समय तक बेहतरीन प्रदर्शन कर सके। Kawasaki Ninja 400: Price

Kawasaki Ninja 400 Accessories and Customization

कावासाकी निंजा 400 के लिए विभिन्न प्रकार के एक्सेसरीज और कस्टमाइजेशन विकल्प उपलब्ध हैं, जो इस बाइक की स्टाइल और परफॉरमेंस को और भी बेहतर बना सकते हैं। इसमें शामिल हैं टैंक पैड्स, एक्स्ट्रा लाइटिंग किट्स, एग्जॉस्ट अपग्रेड्स, और विंडशील्ड एक्सटेंशन्स। इसके अलावा, कई राइडर्स अपने निंजा 400 को पर्सनलाइज़ करने के लिए ग्राफिक्स किट्स और बॉडी पेंट का भी इस्तेमाल करते हैं, जिससे उनकी बाइक और भी अधिक आकर्षक दिखती है। Kawasaki Ninja 400: Price

Kawasaki Ninja 400 Safety Features

कावासाकी निंजा 400 में राइडर की सुरक्षा के लिए कई फीचर्स दिए गए हैं। इसमें एबीएस (एंटी-लॉक ब्रेकिंग सिस्टम) जैसी तकनीक शामिल है, जो अचानक ब्रेक लगाने पर भी बाइक को नियंत्रण में रखने में मदद करती है। इसके अलावा, बाइक में LED लाइटिंग सिस्टम दिया गया है, जो रात में बेहतर दृश्यता प्रदान करता है। साथ ही, इसकी उच्च गुणवत्ता वाली टायर ग्रिप और मजबूत चेसिस डिज़ाइन राइडर को हर प्रकार के सड़क पर सुरक्षित रखने में मदद करते हैं। Kawasaki Ninja 400: Price

Kawasaki Ninja 400 Ownership Experience

कावासाकी निंजा 400 के मालिकाना अनुभव को लेकर भी राइडर्स काफी उत्साहित रहते हैं। यह बाइक न केवल शानदार प्रदर्शन देती है, बल्कि इसका लुक भी आकर्षक है। राइडर्स इसे अपनी डेली कम्यूट के लिए इस्तेमाल कर सकते हैं, साथ ही वीकेंड्स पर लॉन्ग राइड्स के लिए भी यह एक बेहतरीन विकल्प है। इसके अलावा, कावासाकी की विश्वसनीयता और सर्विस नेटवर्क के कारण निंजा 400 के मालिकों को अपनी बाइक की मेंटेनेंस और सर्विसिंग को लेकर भी कोई चिंता नहीं होती।Kawasaki Ninja 400: Price

यह अतिरिक्त जानकारी निंजा 400 के बारे में आपकी समझ को और भी गहरा करेगी, और आपको यह निर्णय लेने में मदद करेगी कि यह बाइक आपकी आवश्यकताओं और प्राथमिकताओं के लिए सही है या नहीं।

2024 में जीवन बीमा के नवीनतम ट्रेंड्स |Latest trends in life insurance

Latest trends in life insurance 2024 में जीवन बीमा के क्षेत्र में कई नए ट्रेंड्स देखने को मिल रहे हैं, जो पॉलिसीधारकों के लिए और भी ज्यादा फायदेमंद हो सकते हैं। डिजिटलाइजेशन, कस्टमाइजेशन और नई तकनीकों के प्रयोग से बीमा योजनाएं अधिक उपभोक्ता-मित्र हो रही हैं। चलिए जानते हैं, 2024 में जीवन बीमा के कौन-कौन से नवीनतम ट्रेंड्स हैं जो आपको ध्यान में रखने चाहिए:

1. डिजिटल जीवन बीमा

2024 में डिजिटल बीमा पॉलिसी खरीदने की प्रवृत्ति तेजी से बढ़ रही है। बीमा कंपनियां ऑनलाइन प्लेटफ़ॉर्म्स के जरिए पॉलिसी खरीदने, क्लेम फाइल करने और पॉलिसी मैनेज करने जैसी सुविधाएं उपलब्ध करा रही हैं। यह प्रोसेस आसान, तेज और अधिक पारदर्शी बन गया है।

  • फायदा: घर बैठे ही बीमा पॉलिसी खरीद सकते हैं, बिना एजेंट के कमीशन।

2. कस्टमाइज्ड बीमा योजनाएं

अब बीमा कंपनियां लोगों की आवश्यकताओं के अनुसार कस्टमाइज्ड जीवन बीमा योजनाएं ऑफर कर रही हैं। यानी आप अपनी पॉलिसी को अपनी उम्र, स्वास्थ्य, और आर्थिक स्थिति के अनुसार डिजाइन कर सकते हैं।

  • फायदा: आपके लिए सही प्रीमियम और लाभ चुनने का मौका मिलता है।

3. टेक्नोलॉजी का प्रभाव

2024 में बीमा उद्योग में आर्टिफिशियल इंटेलिजेंस (AI) और बिग डेटा का व्यापक इस्तेमाल हो रहा है। इन तकनीकों का इस्तेमाल बीमा कंपनियां जोखिम का आकलन करने, क्लेम प्रोसेसिंग को तेज करने और बेहतर कस्टमर सर्विस प्रदान करने के लिए कर रही हैं।

  • फायदा: तेजी से क्लेम स्वीकृति और ग्राहक अनुभव में सुधार।

4. माइक्रो-इंश्योरेंस

कम आय वाले लोगों के लिए 2024 में माइक्रो-इंश्योरेंस की अवधारणा लोकप्रिय हो रही है। इसमें छोटी-छोटी प्रीमियम राशि के साथ जीवन बीमा खरीद सकते हैं, जो विशेष रूप से ग्रामीण क्षेत्रों में महत्वपूर्ण है।

  • फायदा: कम इनकम वाले परिवारों को भी बीमा का लाभ मिलता है।

5. स्वास्थ्य से जुड़ी बीमा योजनाएं

जीवन बीमा में अब स्वास्थ्य संबंधी सुविधाएं भी शामिल हो रही हैं। कंपनियां हेल्थ-लिंक्ड बीमा प्रदान कर रही हैं, जहां आपको बीमा के साथ स्वास्थ्य चेकअप, वेलनेस प्रोग्राम, और हेल्थ कंसल्टेशन जैसी सुविधाएं भी मिलती हैं।

  • फायदा: स्वास्थ्य की निगरानी और बीमा का संयुक्त लाभ।

6. ईको-फ्रेंडली बीमा पॉलिसी

2024 में, बीमा कंपनियां पर्यावरणीय सुरक्षा को ध्यान में रखते हुए ईको-फ्रेंडली बीमा योजनाएं पेश कर रही हैं। ये योजनाएं उन ग्राहकों को प्रोत्साहित करती हैं जो पर्यावरण संरक्षण में योगदान देते हैं, जैसे कि कम कार्बन उत्सर्जन करने वाले वाहनों का उपयोग करने वाले ग्राहकों को कम प्रीमियम मिलता है।

  • फायदा: पर्यावरण-संवेदनशील ग्राहकों के लिए विशेष लाभ।

7. रीवार्ड-बेस्ड इंश्योरेंस

बीमा कंपनियां अब ग्राहकों को रीवार्ड-बेस्ड जीवन बीमा प्रदान कर रही हैं। यानी अगर आप अपने स्वास्थ्य को बनाए रखने के लिए नियमित रूप से योग, व्यायाम, और हेल्दी लाइफस्टाइल अपनाते हैं, तो आपको अतिरिक्त छूट और लाभ मिल सकते हैं।

  • फायदा: स्वास्थ्य और बीमा दोनों में बचत।

8. शॉर्ट-टर्म जीवन बीमा योजनाएं

लंबी अवधि के बीमा के बजाय अब लोग 2024 में शॉर्ट-टर्म जीवन बीमा की ओर रुख कर रहे हैं। यह विशेष रूप से उन लोगों के लिए फायदेमंद है जो कुछ वर्षों के लिए बीमा कवरेज चाहते हैं, जैसे किसी लोन की अवधि के लिए।

9. स्मार्ट क्लेम प्रोसेसिंग

बीमा कंपनियां 2024 में स्मार्ट क्लेम प्रोसेसिंग सिस्टम लागू कर रही हैं, जिससे क्लेम प्रोसेसिंग में तेजी आई है। डिजिटल डॉक्यूमेंटेशन और AI का उपयोग करके अब क्लेम जल्द से जल्द मंजूर किए जा रहे हैं।

  • फायदा: त्वरित और बिना झंझट के क्लेम प्रोसेस।

10. रिस्क मैनेजमेंट और निवेश के अवसर

जीवन बीमा केवल सुरक्षा नहीं बल्कि निवेश का भी विकल्प बन गया है। 2024 में, कई कंपनियां यूलिप (ULIP) जैसी योजनाएं पेश कर रही हैं, जो जोखिम प्रबंधन के साथ-साथ निवेश के अवसर भी देती हैं।

  • फायदा: बीमा के साथ-साथ लंबी अवधि का निवेश लाभ।

2024 में जीवन बीमा इंडस्ट्री में कई नए और महत्वपूर्ण बदलाव हो रहे हैं। डिजिटलाइजेशन, कस्टमाइजेशन, और टेक्नोलॉजी ने बीमा को और भी सरल और उपभोक्ता-मित्र बना दिया है। इन ट्रेंड्स को ध्यान में रखते हुए, आप अपने लिए एक बेहतर और किफायती बीमा पॉलिसी चुन सकते हैं जो आपकी जरूरतों को पूरा करे।

life insurance 2024 trends,
insurance plans in 2024,
Latest Life Insurance Trends,
digital life insurance 2024,
Customized Life Insurance Plans,
micro insurance 2024,
Health-Linked Life Insurance,
short-term life insurance,
Technology in Life Insurance,
Smart Claim Processing Insurance,


ये ट्रेंड्स न केवल जीवन बीमा को आसान बना रहे हैं बल्कि इसमें पारदर्शिता और उपभोक्ता संतुष्टि भी बढ़ा रहे हैं।

Introduction To Tally Prime 1

Certainly! Here is a detailed step-by-step Introduction To Tally Prime 1 guide on the fundamentals of accounting and Tally Prime, including practice assignments: Introduction To Tally Prime


Introduction to Tally Prime 1

Tally Prime is a comprehensive business management software for small and medium enterprises. It provides functionalities such as accounting, inventory management, taxation, payroll, and more. Introduction To Tally Prime

Key Features

  • Accounting: Manage all financial transactions.
  • Inventory Management: Track and manage inventory.
  • Taxation: GST, VAT, and other tax compliance.
  • Payroll Management: Manage employee salaries and benefits.
  • Banking: Simplifies banking transactions.

Setting Up Tally Prime

Installation

  1. Download Tally Prime:
  • Visit the official Tally Solutions website.
  • Download the latest version of Tally Prime.
  1. Install Tally Prime:
  • Run the downloaded file.
  • Follow the on-screen instructions to complete the installation.

Creating a Company

  1. Open Tally Prime:
  • Double-click the Tally Prime icon on your desktop.
  1. Create a Company:
  • Go to the “Create Company” option.
  • Enter company details such as name, address, financial year, etc.
  • Save the company information.

Basic Accounting in Tally Prime

Creating Ledgers

  1. Go to Gateway of Tally > Accounts Info > Ledgers:
  • Select “Create” to add a new ledger.
  • Enter the ledger name and group it belongs to (e.g., Bank, Sales, Expenses).

Recording Transactions

  1. Go to Gateway of Tally > Accounting Vouchers:
  • Select the type of voucher (e.g., Payment, Receipt, Sales).
  • Enter the required details like date, ledger names, and amounts.
  • Save the voucher.

Viewing Reports

  1. Go to Gateway of Tally > Display:
  • Select the type of report (e.g., Balance Sheet, Profit & Loss, Stock Summary).
  • View and analyze your financial reports.

Inventory Management in Tally Prime

Creating Stock Groups

  1. Go to Gateway of Tally > Inventory Info > Stock Groups:
  • Select “Create” to add a new stock group.
  • Enter the group name and other details.

Creating Stock Items

  1. Go to Gateway of Tally > Inventory Info > Stock Items:
  • Select “Create” to add a new stock item.
  • Enter the item name, stock group, and other relevant details.

Recording Inventory Transactions

  1. Go to Gateway of Tally > Inventory Vouchers:
  • Select the type of inventory voucher (e.g., Purchase, Sales).
  • Enter the required details and save the voucher.

Taxation in Tally Prime

Setting Up GST

  1. Enable GST:
  • Go to Gateway of Tally > F11: Features > Statutory & Taxation.
  • Enable GST and enter the GST details.

Recording GST Transactions

  1. Create GST Ledgers:
  • Create ledgers for CGST, SGST, IGST under Duties & Taxes.
  1. Enter GST Transactions:
  • Record sales and purchase transactions with GST details.

Viewing GST Reports

  1. Go to Gateway of Tally > Display > Statutory Reports > GST:
  • View GST reports like GSTR-1, GSTR-3B.

Payroll Management in Tally Prime

Setting Up Payroll

  1. Enable Payroll:
  • Go to Gateway of Tally > F11: Features > Payroll.
  • Enable payroll features.

Creating Employee Masters

  1. Go to Gateway of Tally > Payroll Info > Employees:
  • Select “Create” to add a new employee.
  • Enter employee details such as name, designation, salary details.

Processing Payroll

  1. Go to Gateway of Tally > Payroll Vouchers:
  • Select “Payroll” to record salary payments.
  • Enter the required details and save the voucher.

Viewing Payroll Reports

  1. Go to Gateway of Tally > Display > Payroll Reports:
  • View payroll reports like Payslip, Payroll Statement.

Banking in Tally Prime

Creating Bank Ledgers

  1. Go to Gateway of Tally > Accounts Info > Ledgers:
  • Select “Create” to add a new bank ledger.
  • Enter the bank name and other details.

Recording Bank Transactions

  1. Go to Gateway of Tally > Accounting Vouchers:
  • Select the type of bank voucher (e.g., Payment, Receipt).
  • Enter the required details and save the voucher.

Reconciling Bank Accounts

  1. Go to Gateway of Tally > Display > Banking > Bank Reconciliation:
  • Select the bank account.
  • Reconcile bank statements with the ledger.

Practice Assignments

Assignment 1: Create a Company

  1. Create a new company with the name “XYZ Traders.”
  2. Set the financial year from 1st April 2023.

Assignment 2: Create Ledgers and Record Transactions

  1. Create the following ledgers:
  • Bank Account (Under Bank Accounts)
  • Sales (Under Sales Accounts)
  • Purchase (Under Purchase Accounts)
  1. Record the following transactions:
  • Sale of goods worth $500 to a customer.
  • Purchase of goods worth $300 from a supplier.

Assignment 3: Inventory Management

  1. Create a stock group named “Electronics.”
  2. Create a stock item named “Laptop” under the Electronics group.
  3. Record a purchase transaction of 10 laptops.

Assignment 4: GST Setup and Transactions

  1. Enable GST for your company.
  2. Create GST ledgers for CGST, SGST, IGST.
  3. Record a sales transaction with applicable GST.

Assignment 5: Payroll Management

  1. Create an employee named “John Doe” with a monthly salary of $2000.
  2. Record a payroll voucher for the salary payment of John Doe.

Assignment 6: Bank Transactions and Reconciliation

  1. Create a bank ledger for “ABC Bank.”
  2. Record a bank payment transaction.
  3. Perform bank reconciliation for ABC Bank.

By following these steps and completing the practice assignments, you will gain a solid understanding of Tally Prime’s features and functionalities, helping you manage business operations efficiently.Introduction To Introduction To Tally Prime 1Introduction To Tally Prime 1Introduction To Tally Prime 1Introduction To Tally Prime 1Introduction To Tally Prime 1Introduction To Tally Prime 1Introduction To Tally Prime 1Introduction To Tally Prime 1Introduction To Tally Prime 1Introduction To Tally Prime 1Introduction To Tally Prime 1

Key Features of Tally Prime

Tally Prime is designed to simplify business management tasks, especially accounting, inventory, and tax compliance. Below are the standout features that make it a popular choice: Key Features of Tally Prime

1. User-Friendly Interface

Tally Prime offers an intuitive and easy-to-navigate interface, even for users with no prior accounting experience. Its simple design reduces the learning curve and allows quick access to functions.

2. Multi-Tasking Capabilities

One of the major upgrades in Tally Prime is its multi-tasking ability. Users can work on multiple tasks simultaneously without closing the current window. For instance, you can switch between reports, invoices, and bank reconciliation easily.

3. GST Compliance

Tally Prime is GST-ready and simplifies all aspects of GST management, from invoice generation to GSTR-1 and GSTR-3B filing. It automates tax calculations and ensures that you stay compliant with GST regulations.

4. Inventory Management

Managing inventory becomes easy with Tally Prime. You can track stock movements, monitor reorder levels, and generate detailed inventory reports. It helps businesses maintain optimum stock levels and avoid stock shortages.

5. Comprehensive Business Reports

Tally Prime generates various insightful reports, including Profit & Loss, Balance Sheets, Cash Flow, Stock Summary, and GST reports. These reports help businesses make informed decisions by providing real-time data. Key Features of Tally Prime

6. Bank Reconciliation

Tally Prime offers an automatic bank reconciliation feature. It helps you reconcile your bank statements quickly and accurately, saving time and minimizing errors. Key Features of Tally Prime

7. Remote Access

Tally Prime allows authorized users to access the software remotely. This feature is particularly useful for business owners and accountants who need to work from different locations. Key Features of Tally Prime

8. Data Security and Backup

With enhanced security features, Tally Prime ensures that your data is always protected. It offers user-level password protection, role-based access control, and data encryption to keep sensitive information secure. Key Features of Tally Prime

9. Invoicing

Tally Prime simplifies the invoicing process. You can create professional and GST-compliant invoices for goods and services. It also supports different billing formats and multi-currency billing. Key Features of Tally Prime

10. Multi-Language Support

Tally Prime offers support in multiple languages, which helps businesses operating in different regions of India and abroad. Users can view reports and invoices in their preferred language. Key Features of Tally Prime

11. Payroll Management

Tally Prime helps businesses manage employee payroll efficiently. It calculates salaries, statutory deductions like PF and ESI, and generates payslips automatically. Key Features of Tally Prime

12. Customizable and Scalable

Tally Prime is highly customizable, allowing businesses to tailor the software according to their needs. It’s also scalable, so whether you are a small business or a large enterprise, Tally Prime grows with you. Key Features of Tally Prime

13. Faster Data Processing

With Tally Prime, data entry and processing are quicker and more efficient, allowing businesses to generate reports and analyze financial data in real-time.

Key Features of Tally Prime

These features make Tally Prime an essential tool for businesses looking to streamline their accounting, tax, and inventory management processes.